Table of Contents
When a sewage backup hits your property, you need to act fast and in the right order to protect occupants and Restore Property efficiently. You’ll secure the area, remove standing water, assess contamination, and strip out damaged materials before drying and cleaning begin. Each step affects safety, repair cost, and recovery time. Miss one detail, and you can create bigger problems later. The real challenge is knowing which actions matter first and which can wait.
Key Takeaways
- Shut off the sewage source immediately and contact a licensed plumber or sewer emergency service.
- Isolate the affected area, restrict access, and use proper protective gear to prevent contamination.
- Pump out standing wastewater, then clean and disinfect all impacted surfaces and materials.
- Remove contaminated porous materials, dry the structure thoroughly, and monitor moisture levels daily.
- Restore utilities safely and document all damage with photos, receipts, and contractor reports for insurance.
Stop the Sewage Backup Fast
If sewage is still flowing into the property, shut off the source immediately and call a licensed plumber or sewer emergency service.
You need a fast emergency response to limit spread and keep the sewage backup from worsening. If the backup affects a floor drain, toilet, or cleanout, stop using all connected fixtures right away.
Confirm whether the main line is blocked, the lift station has failed, or a municipal issue is pushing waste back toward you.
When you document the source and timing, you help your team coordinate the next step with confidence.
Keep your communication direct, and stay with others who understand the urgency. Acting quickly protects the structure, reduces contamination, and sets you up for a cleaner recovery process.
Secure the Area and Protect Workers
Once the sewage source is under control, isolate the affected area so contamination doesn’t spread. You should lock doors, post warning signs, and limit entry to trained personnel only.
Set up barriers, turn off HVAC if needed, and maintain clear access for your crew. You’ll protect everyone by enforcing safety protocols: gloves, boots, eye protection, and respirators where exposure risk exists.
Before anyone enters, confirm worker training covers biohazard handling, slip hazards, and communication procedures. Assign one point person to track who goes in and out, so your team stays coordinated and accountable.
If you share the same standards, you build a safer, more confident response. Check PPE fit, replace damaged gear, and document hazards as you go.
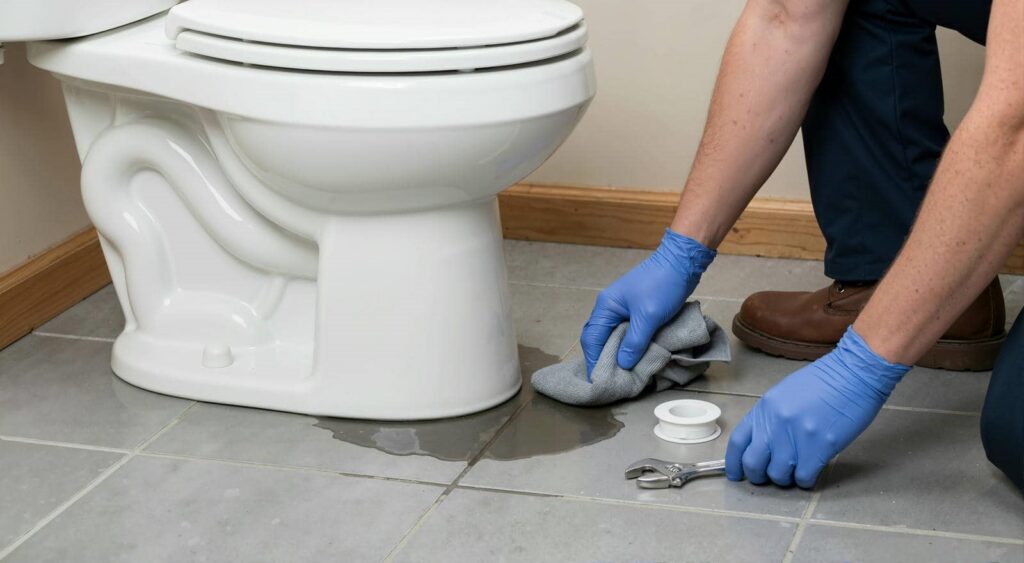
Pump Out Sewage Water
You should contain the sewage first by blocking drains and setting up barriers so the contaminated water doesn’t spread farther.
Then you can pump it out with submersible or vacuum extraction equipment, using controlled removal to limit aerosolization and structural damage.
After extraction, you need to sanitize all affected surfaces and materials with approved disinfectants to reduce microbial contamination.
Sewage Containment Steps
Start sewage containment by pumping out the standing wastewater as soon as the area is safe to access. You protect your property best when you isolate the source, mark the affected zone, and keep everyone out.
Use sewage containment techniques that limit spread, and follow emergency response plans so your crew moves in a coordinated way. Shut off nearby HVAC returns, remove loose materials that can trap contamination, and set absorbent barriers at thresholds to stop migration.
You’ll also want to document water levels, affected surfaces, and access points before cleanup begins. Keep power disconnected in wet areas unless a licensed professional confirms it’s safe.
Safe Pump-Out Methods
Before you pump out sewage water, verify that the area is electrically safe, ventilated, and stable enough for equipment access.
You should isolate the work zone, then position pump out equipment on solid footing to prevent tipping and hose strain. Use hoses rated for contaminated liquid, secure all connections, and route discharge to an approved holding point or disposal path.
Monitor flow so you don’t overload drains, pits, or the pump. If the water level drops unevenly, pause and reset suction to avoid cavitation and debris jams.
Keep emergency procedures ready, including shutoff access, spill control materials, and a clear exit route. Work with a partner when possible; shared oversight helps you stay efficient, coordinated, and confident throughout the extraction process.
Sanitizing Affected Areas
Once the sewage water is removed, clean and disinfect every affected surface, paying close attention to floors, baseboards, wall cavities, and any porous materials that remained wet.
Use a disinfectant rated for sewage exposure, and keep the surface wet for the full contact time on the label.
Remove and discard drywall, insulation, carpet pad, and other materials that can’t be reliably sanitized.
You’ll need gloves, eye protection, and respiratory protection while you work, because lingering contamination can create health risks.
Ventilate the area to reduce sewage odors and speed drying.
After cleaning, inspect hidden spaces with a moisture meter or infrared camera.
If you spot residue, repeat the process.
When you restore each surface methodically, you help protect your space and support everyone who belongs in it.
Assess the Damage After a Sewage Backup
After you pump out the sewage water, trace the contamination source so you can determine whether the backup came from a drain line, floor drain, or main sewer.
You should inspect structural impact next, checking walls, subfloors, framing, and insulation for saturation, staining, warping, or loss of integrity.
This assessment tells you which materials you can clean, dry, or remove before restoration starts.
Identify Contamination Source
Pinpoint the contamination source right away so you can assess the true extent of sewage damage and plan safe restoration steps. You should trace the backup to its origin: toilet overflow, floor drain, sewer line, or municipal main.
Classify contamination types, since graywater, blackwater, and mixed waste each demand different controls. Mark where liquid traveled, where it pooled, and which materials it contacted. This lets you isolate affected rooms and limit spread to clean zones.
Note odors, discoloration, and residue patterns, because they reveal how far the waste moved. Identify health risks before you enter repeatedly; sewage can carry bacteria, viruses, and parasites.
Wear PPE, keep others out, and document findings so your crew can coordinate quickly and restore your space with confidence.
Inspect Structural Impact
You should map wet areas, note sagging, swelling, delamination, and discoloration, then document each finding with photos and measurements.
Perform a foundation assessment if you see settlement, cracks, or heaving near affected walls, because moisture can shift support conditions.
For any load bearing evaluation, verify that beams, joists, studs, and connections remain sound and unwarped.
If materials stay soft after drying, or if odor persists inside cavities, treat them as hidden damage.
Work with a licensed inspector or structural pro so you’re not guessing.
That team approach helps you protect your home, your schedule, and everyone who lives there.
Remove Contaminated Sewage Materials
Once sewage backs up into a property, you need to remove all contaminated porous materials right away, including carpet, insulation, drywall, padding, upholstered furniture, and any other item that has absorbed wastewater.
You’ll protect the rest of the structure by isolating affected rooms and bagging debris as you go. Use approved sewage removal techniques to lift materials without spreading residue, and keep tools dedicated to the job.
Follow local disposal regulations for every load, because contaminated waste can’t go to regular trash. Wear gloves, boots, eye protection, and a respirator so you can work safely with your crew.
If an item can’t be fully decontaminated or dried, discard it. Acting quickly helps you keep the property stable and supports everyone involved in recovery.
Clean and Disinfect After Sewage Backup
Before you clean, wear waterproof gloves, boots, eye protection, and an N95 or similar respirator to limit exposure to sewage pathogens.
You should wash all hard surfaces with detergent and hot water, then apply a disinfectant labeled for sewage cleanup and keep the required contact time.
After that, rinse, dry, and inspect the area so you can confirm that no residue or odor remains.
Sewage Safety Precautions
When sewage backs up into a property, you need to treat the area as a biohazard and act quickly to reduce health risks and secondary damage. Protect your team and household by limiting entry, isolating the affected zone, and following sewage health guidance from local authorities.
You’re not alone—these precautions help everyone stay safer and more confident during recovery.
- Wear gloves, boots, and a fitted respirator before you enter.
- Shut off HVAC systems to limit airborne contamination risks.
- Remove children, pets, and unsecured food from the area immediately.
Use sealed bags for contaminated waste, wash hands after every contact, and report exposure symptoms right away.
If you can’t control odors, standing water, or contamination, call qualified restoration professionals who know how to manage the hazard correctly.
Deep Cleaning Steps
Start with a full debris removal, then clean every hard surface with hot water and a detergent that can break down organic residue.
Use deep cleaning techniques in a fixed sequence: scrub top to bottom, rinse, then apply an EPA-registered disinfectant at the correct dwell time.
Wear gloves, boots, and eye protection, and keep ventilation strong.
You’ll need essential cleaning supplies such as buckets, microfiber cloths, brushes, a wet vacuum, and labeled sanitizer.
Remove porous items that stayed wet too long, because they can hold contamination.
Wash salvageable textiles in hot water, then dry them completely.
After each room, change rinse water and replace soiled cloths.
Finish by checking for odor, stains, and slippery residue so your space feels safe again.
Dry the Building Thoroughly
You need to dry every affected area thoroughly to stop moisture from lingering in walls, flooring, insulation, and framing. Use moisture control to track hidden dampness, then apply targeted drying techniques that match each material. Keep airflow across surfaces, open cavities where needed, and remove wet contents that block evaporation.
- Measure moisture in baseboards, subfloors, and wall cores with a calibrated meter.
- Increase surface exposure by removing trim, drilling access points, or lifting flooring when necessary.
- Recheck readings daily until levels return to safe, stable ranges.
You belong in a recovery process that’s exact and disciplined. Don’t seal materials too soon; trapped water can cause swelling, odors, and structural loss.
Drying isn’t complete until every reading confirms the building’s safe condition.
Get HVAC and Utilities Back Online
Once the structure is dry, bring HVAC and utility systems back online in a controlled sequence so you don’t reintroduce moisture, overload damaged components, or miss hidden safety issues.
Start with utility restoration at the main panel, then verify gas, water, and electrical service one by one.
Inspect HVAC systems for wet insulation, clogged drains, and contaminated filters before you power them up.
If you smell gas, hear unusual noise, or see tripped breakers, stop and call a licensed technician.
Run each system briefly, watch for leaks, temperature swings, and abnormal amperage, and keep vents open for airflow.
You’re not doing this alone; a careful restart protects your team’s shared space and helps everyone return with confidence.
Document Damage for Insurance
Damage logs are your claim’s backbone, so document every affected area before cleanup or repairs erase evidence. You’ll strengthen insurance documentation by photographing wide shots, close-ups, and serial numbers, then pairing each image with dates, locations, and notes.
Keep your damage assessment factual: list water lines, warped materials, odors, and visible residue without guessing at hidden losses.
- Record each room, surface, and appliance in sequence.
- Save receipts, estimates, and contractor reports in one folder.
- Back up files to cloud storage and share copies with your adjuster.
This organized approach helps you speak clearly with your insurer, support your claim, and move forward with confidence.
Prevent Future Sewage Backups
To reduce the risk of another sewage backup, inspect and maintain the plumbing system on a set schedule. You should clear drain lines, test backflow valves, and verify that sump pumps discharge properly.
Use sewage prevention tips like keeping grease, wipes, and paper towels out of toilets and sinks. Schedule camera inspections if you notice slow drains, odors, or repeated clogs.
Apply drainage maintenance strategies by cleaning gutters, extending downspouts, and grading soil away from the foundation so water moves out fast.
Keep cleanouts accessible and label shutoff points for quick action. When you stay proactive, you protect your home, support your household’s routine, and reduce the chance of another messy disruption for everyone who lives there.
Frequently Asked Questions
How Long Should I Wait Before Reentering the Property?
You should wait until your restoration team clears the property, usually after hazards, moisture, and contaminants are controlled. Follow the restoration timeline, follow all safety precautions, and reenter only when air quality and structure checks pass.
Can I Stay in the Home During Restoration?
You can stay only if cleanup is contained and health concerns are low; otherwise, use temporary housing. Keep ventilation strong, isolate work zones, and verify moisture, sewage, and air-quality readings before reentering.
What Permits Are Needed for Sewer Damage Repairs?
You’ll usually need a plumbing or sewer repair permit, plus possible excavation, roadway, and environmental approvals. Check local permit requirements before you start; inspectors may also require post-repair testing, documentation, and final sign-off.
How Do I Choose a Qualified Restoration Company?
Choose a restoration company with verified restoration certifications and strong company reviews. You’ll join homeowners who trust firms with 24-hour response; fast, documented service reduces stress and loss after damage.
Will Sewage Backup Affect My Property Value?
Yes—sewage backup can lower your property value. You’ll face sewage damage, health risks, restoration costs, and long term effects. A thorough property inspection, solid insurance claims, preventive measures, and market trends help you protect value.
Wrap-Up
Restoring property after backups takes fast action, careful cleanup, and strict documentation. You need to stop the sewage, protect workers, pump out water, remove contaminated materials, and dry the structure completely. Then you can restart utilities, record every loss for insurance, and reduce the chance of another backup. Treat the process like a relay: each step must pass cleanly to the next. If you stay methodical, you’ll restore the property safely and efficiently.